-
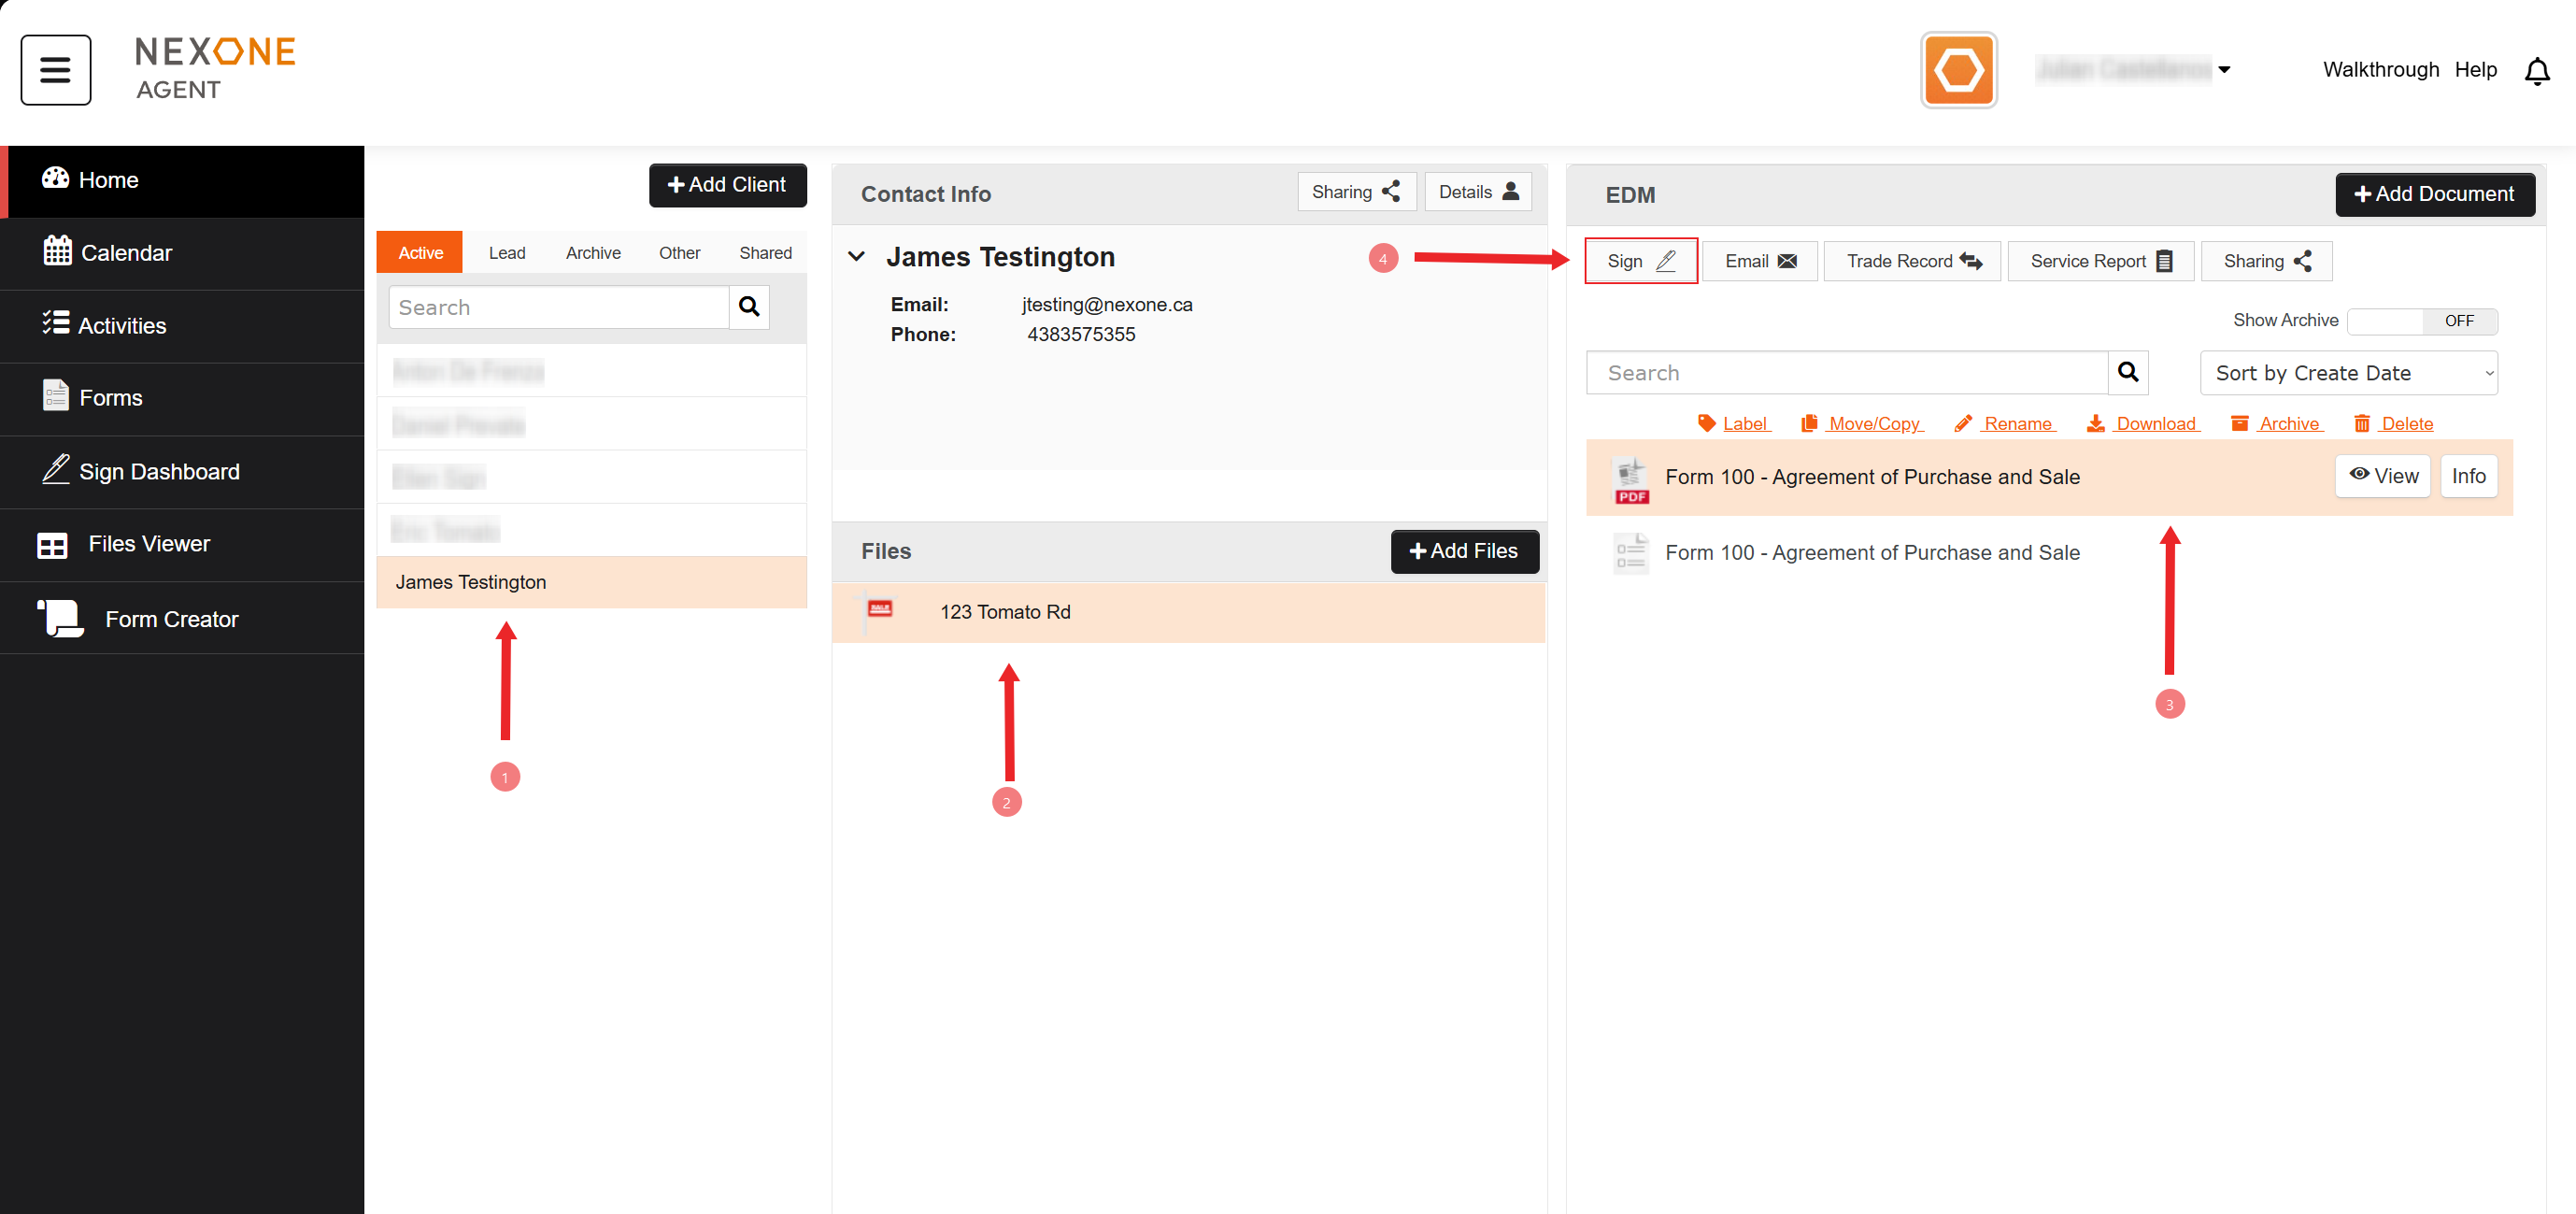
In your NexOne Agent account, select your Client.
-
Pick a Transaction.
-
Click on Sign.
-
You will be redirected to create your Signing Session.
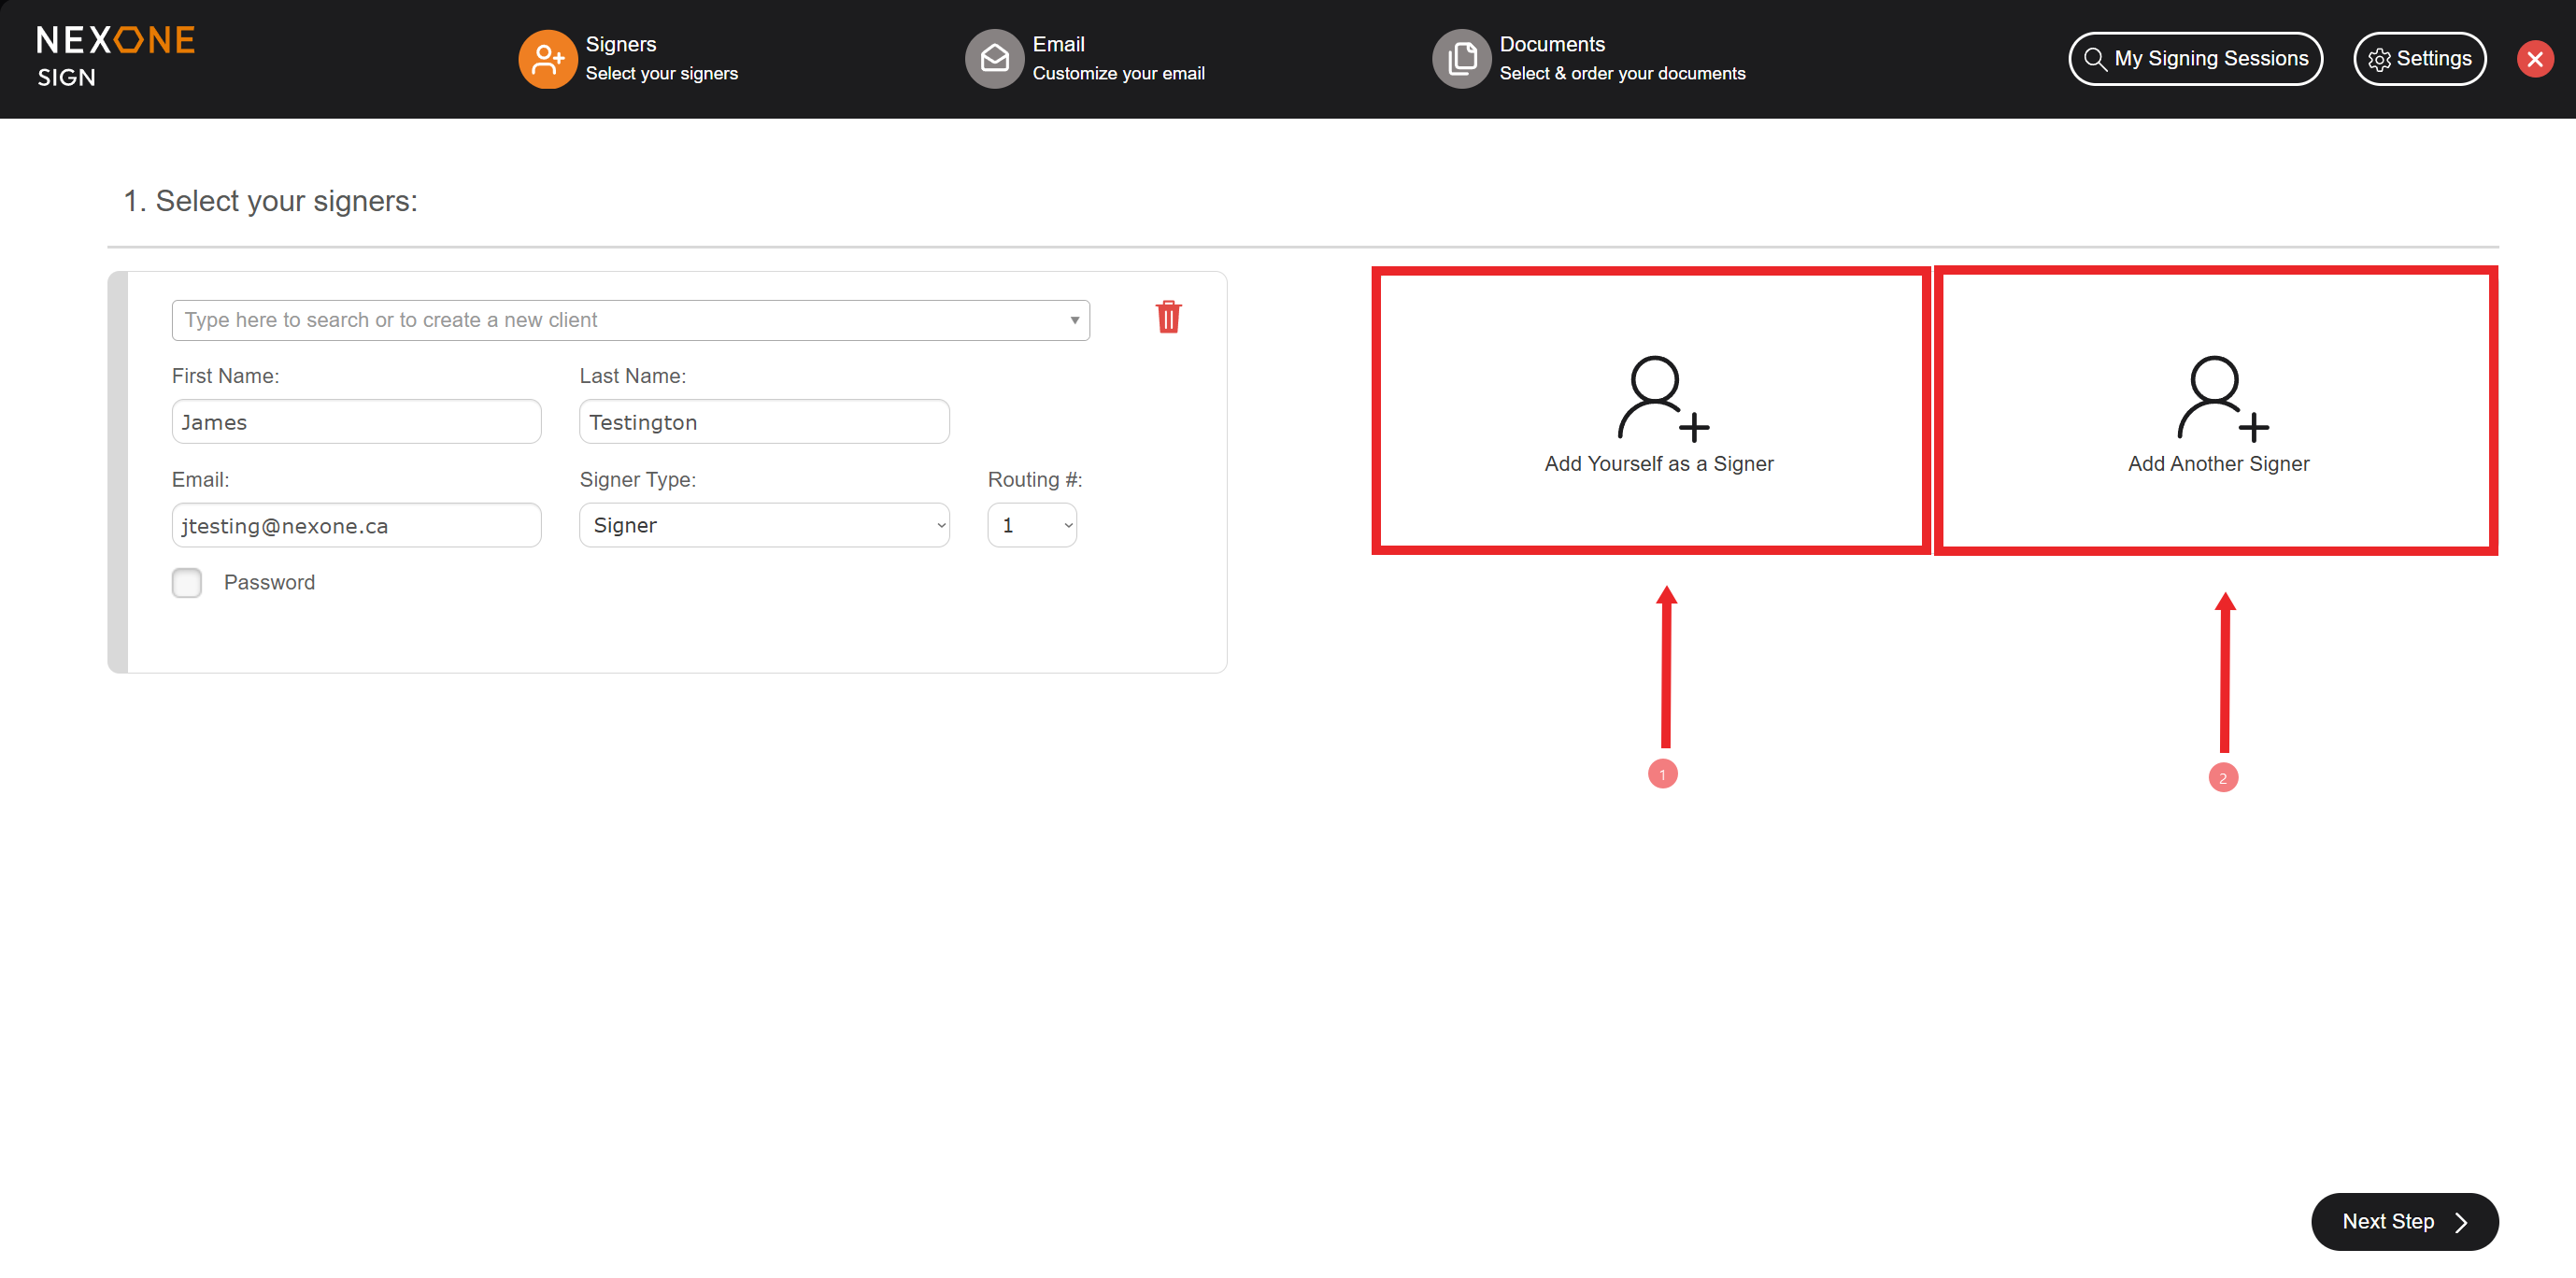

5. In this section, you will be able to add yourself as a signer (only if you need to sign or initial).
6. Also you will be able to add additional Signers (you can use the drop-down menu to add existing clients/agents/lawyers).
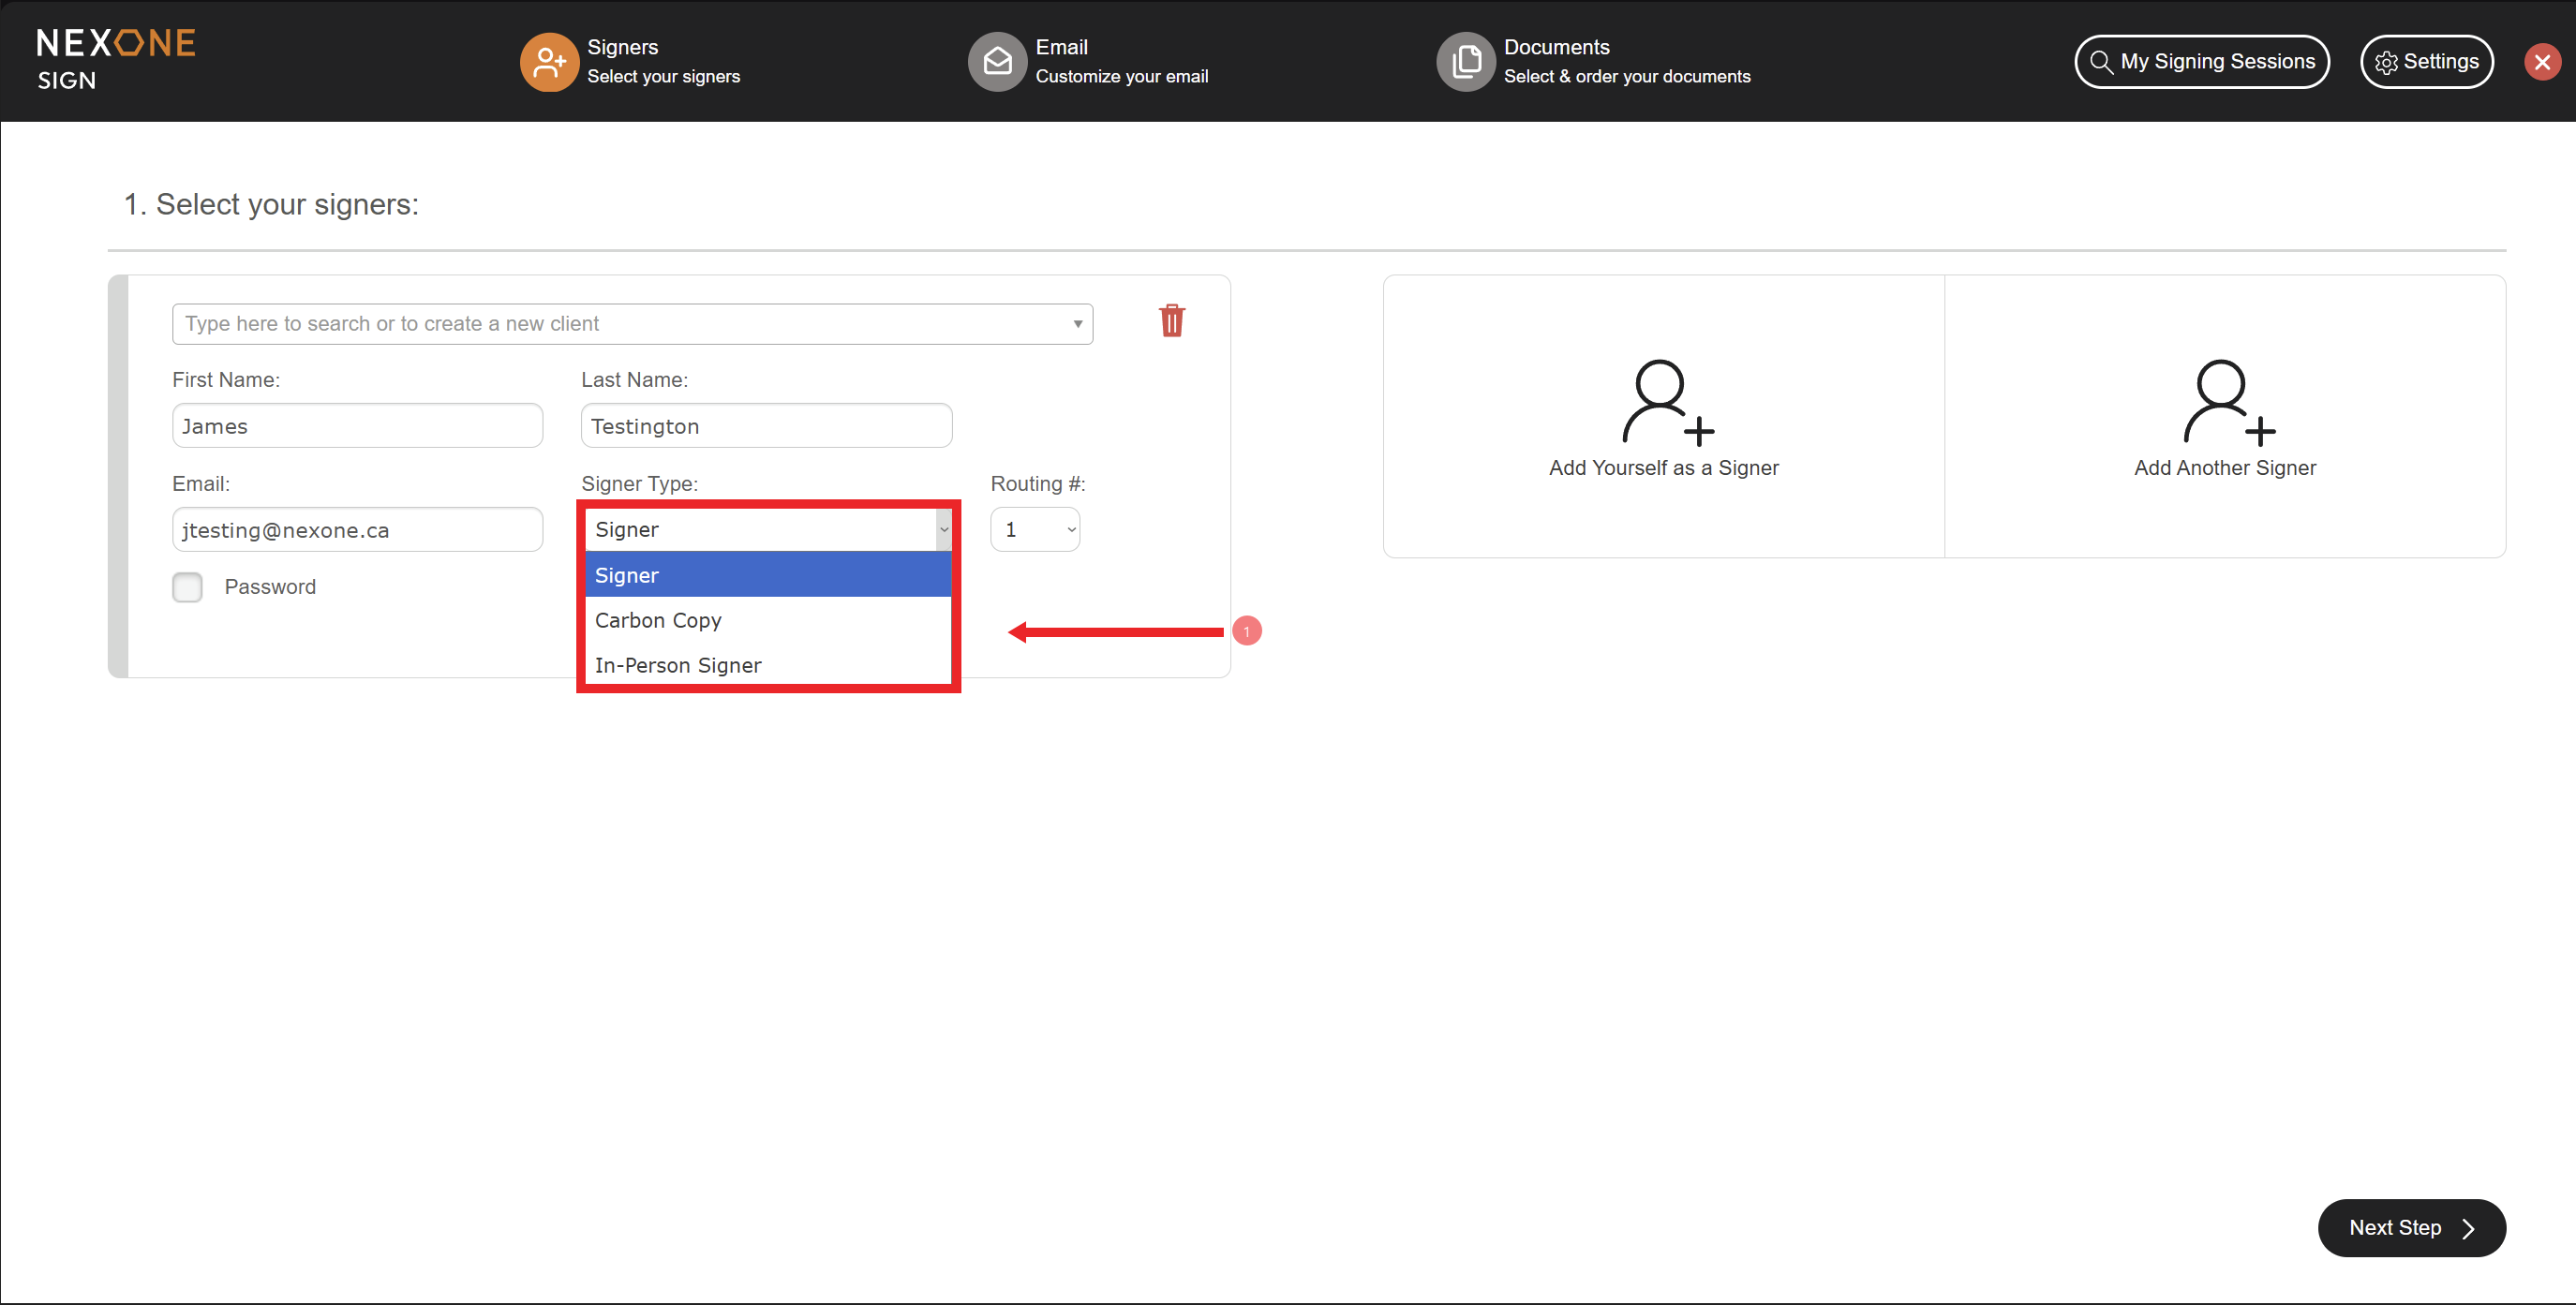

7. While setting your client's information, there are different Signer Types available to you:
Signer → Signer's will sign from their email inbox
Carbon Copy → The individual is set to receive a copy of the completed/signed document, without having to sign.
In-Person Signer → Used when your client will sign in-person on your device.
Routing #
The routing number will determine the order of reception of the signature request by your clients.
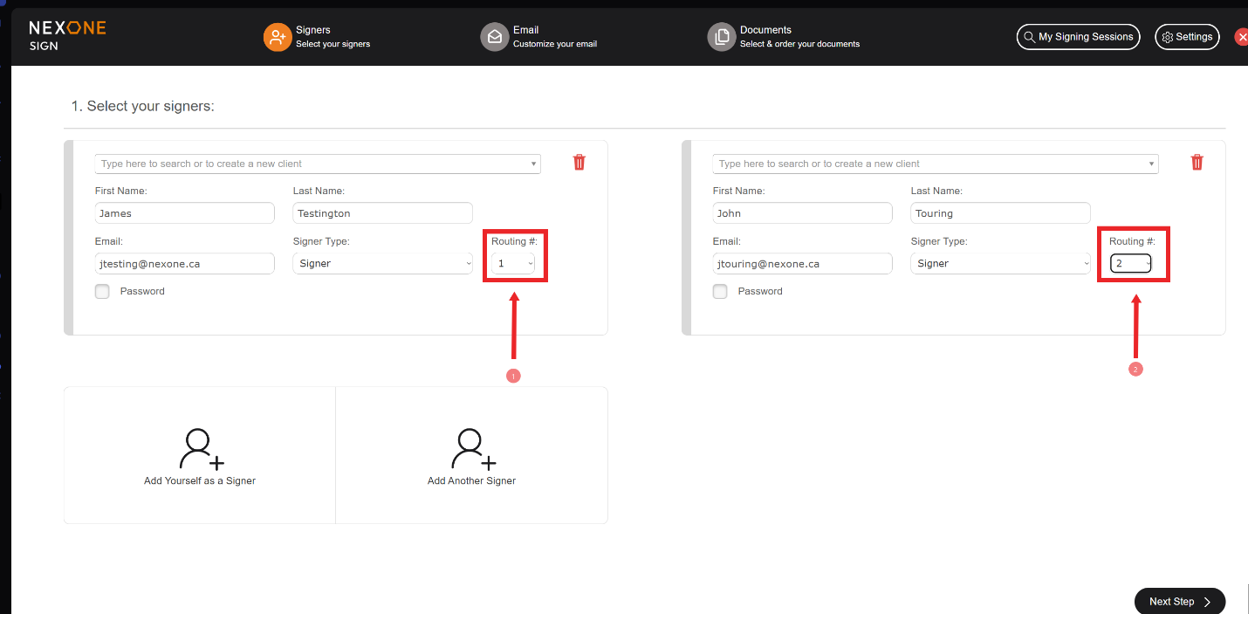

8. In the example above, James is set as routing #1 and John as routing #2, which means that James will receive the signature request by email first. Once he completes his signing session, John will receive an email to start his signature request.
If both clients were set as routing #1, then they will receive the request by email at the same time, and they will be able to start their signing session whenever they need to.
Password
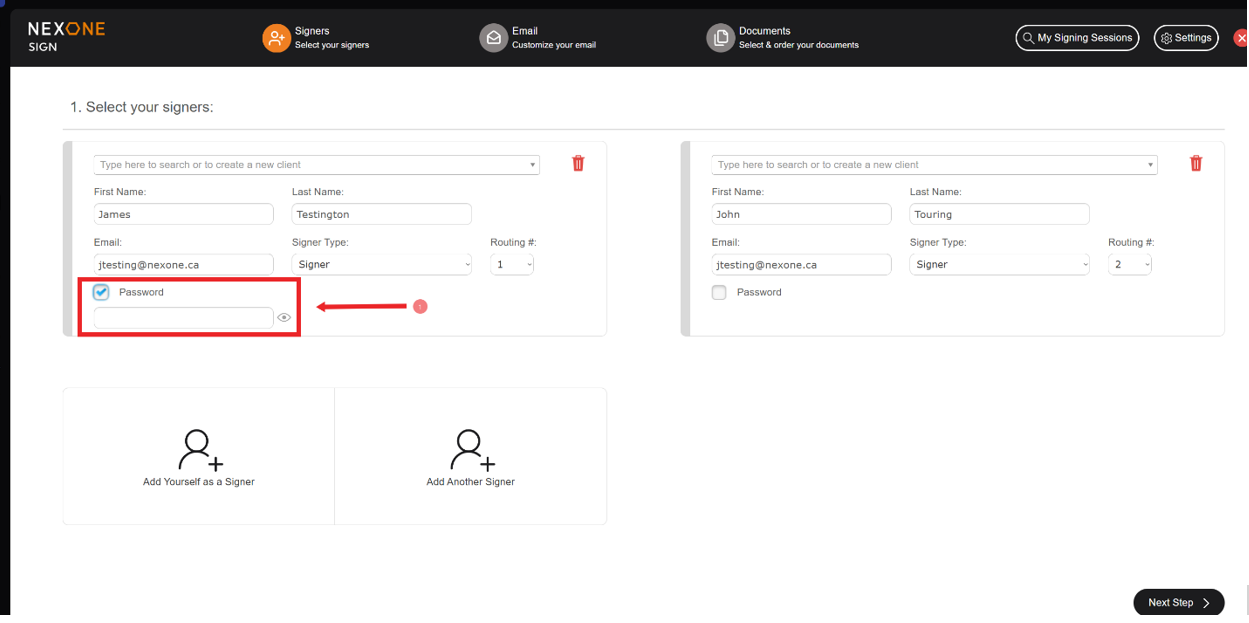

9. For additional security and validation, passwords can be used when two or more clients share the same email address. In this situation, you will set a different password for each client using the same email address, each with their respective password. Then, before clicking on their signature request, each client will have to enter their own password first so they can access their signing session.
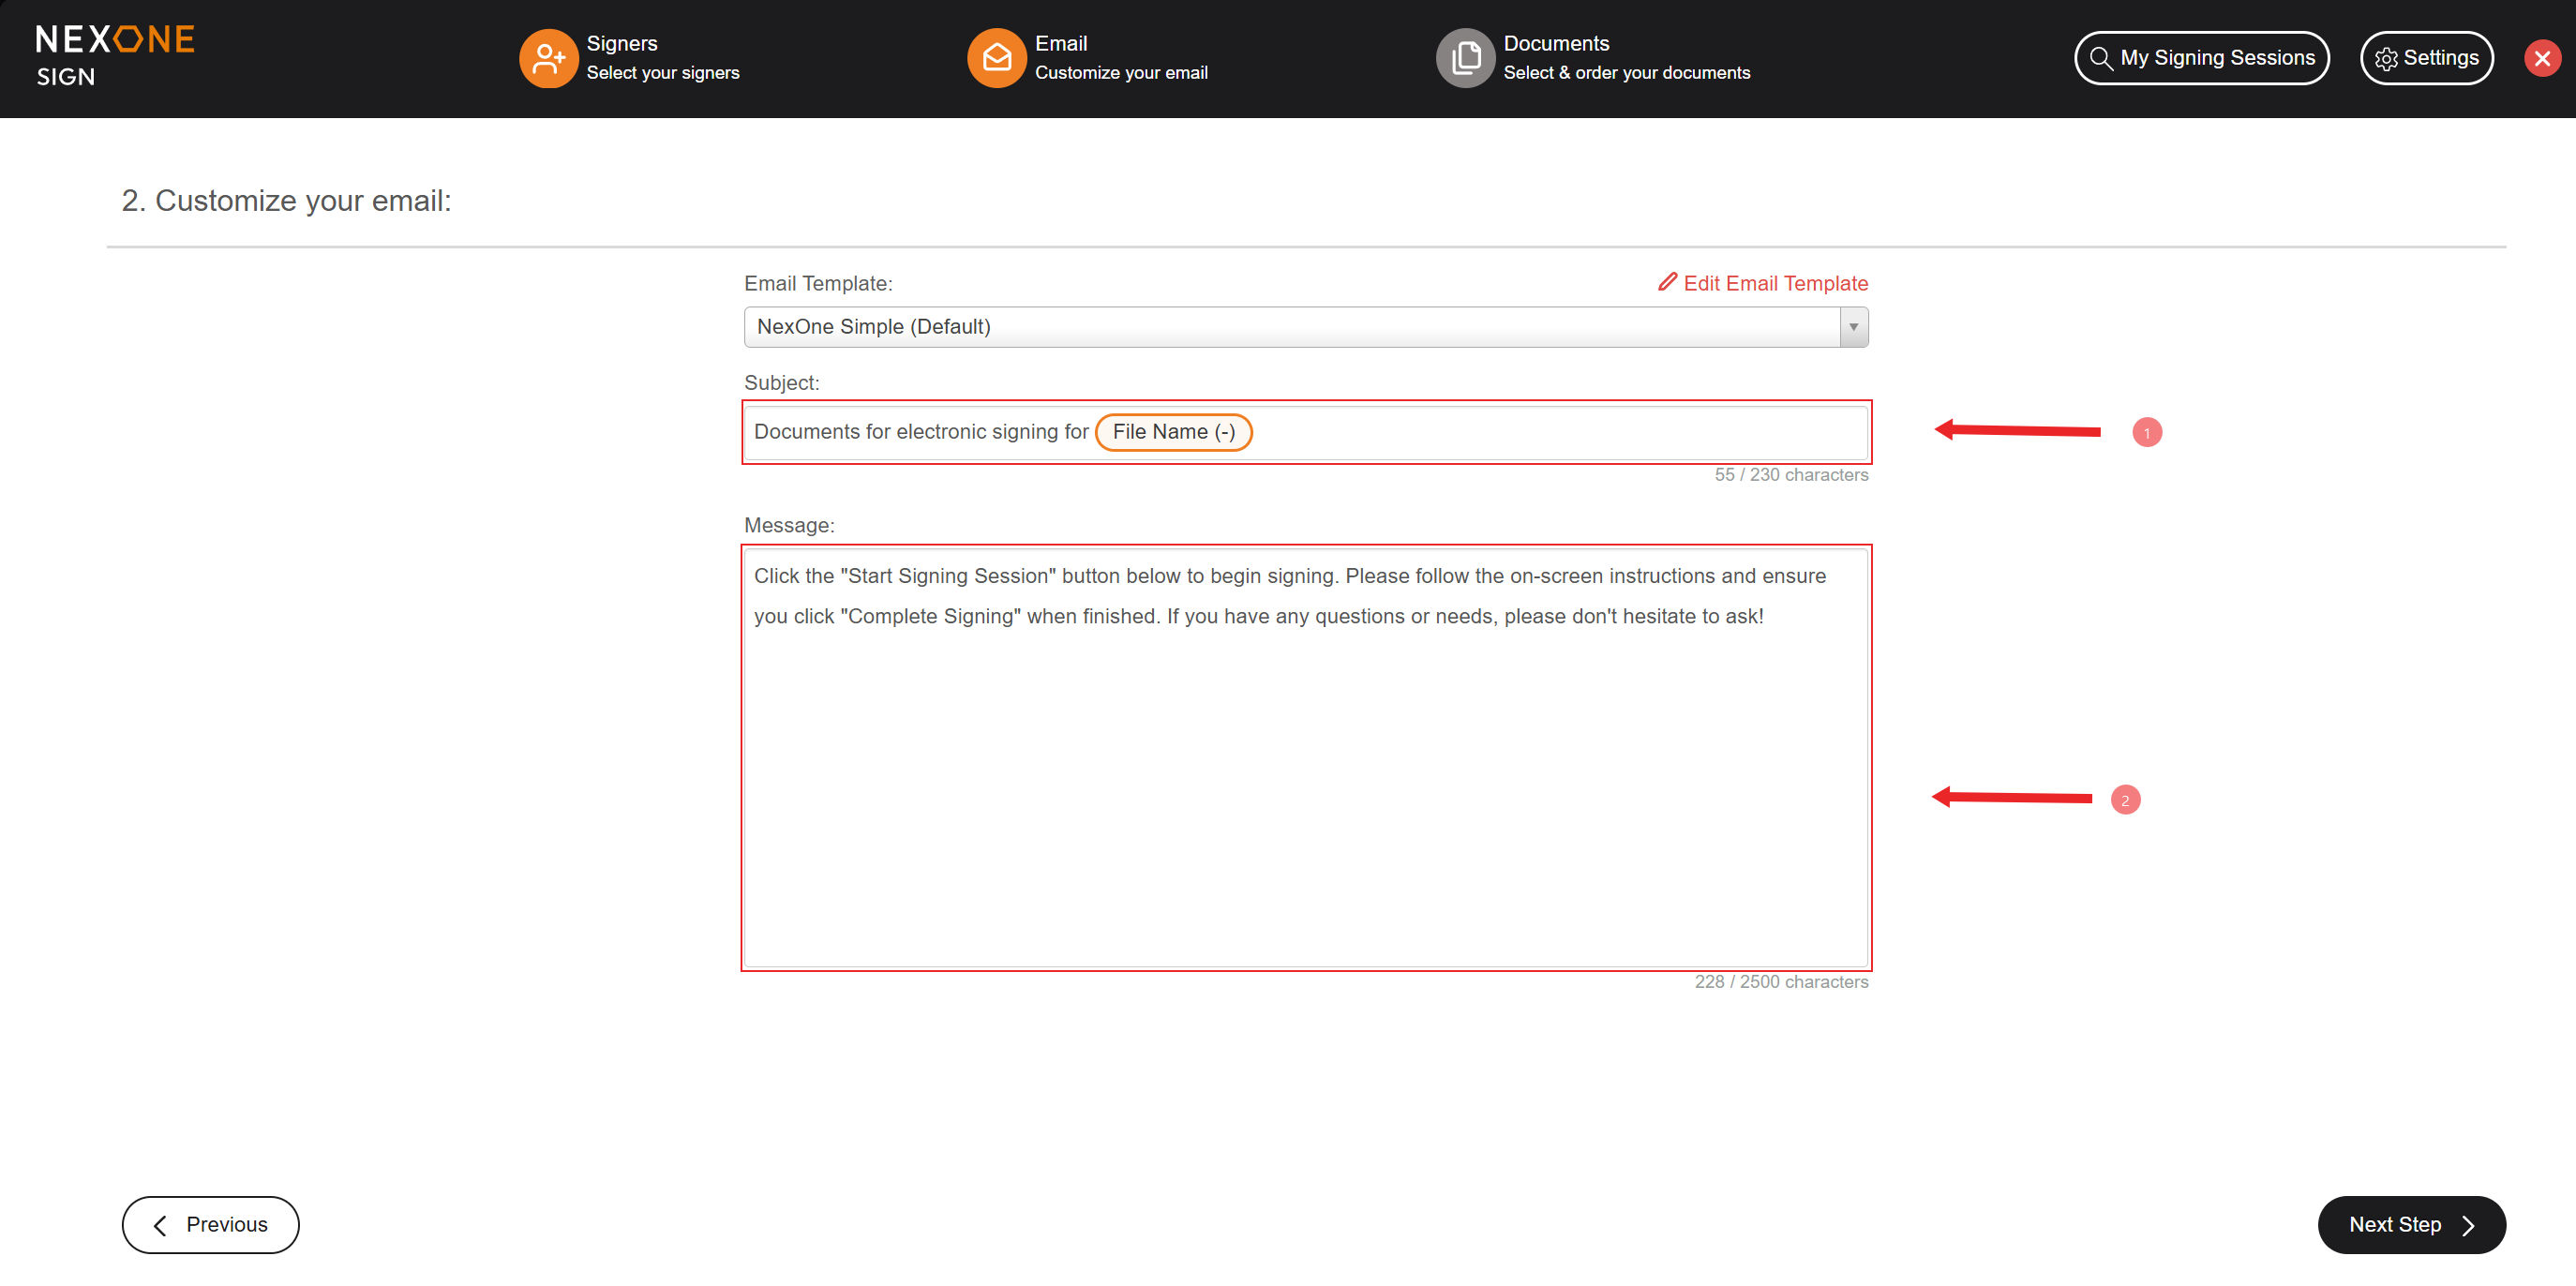

10. Once the clients are added, edit the subject (your signature request name).
11. Leave a message for your client. (Both of these sections are not mandatory)
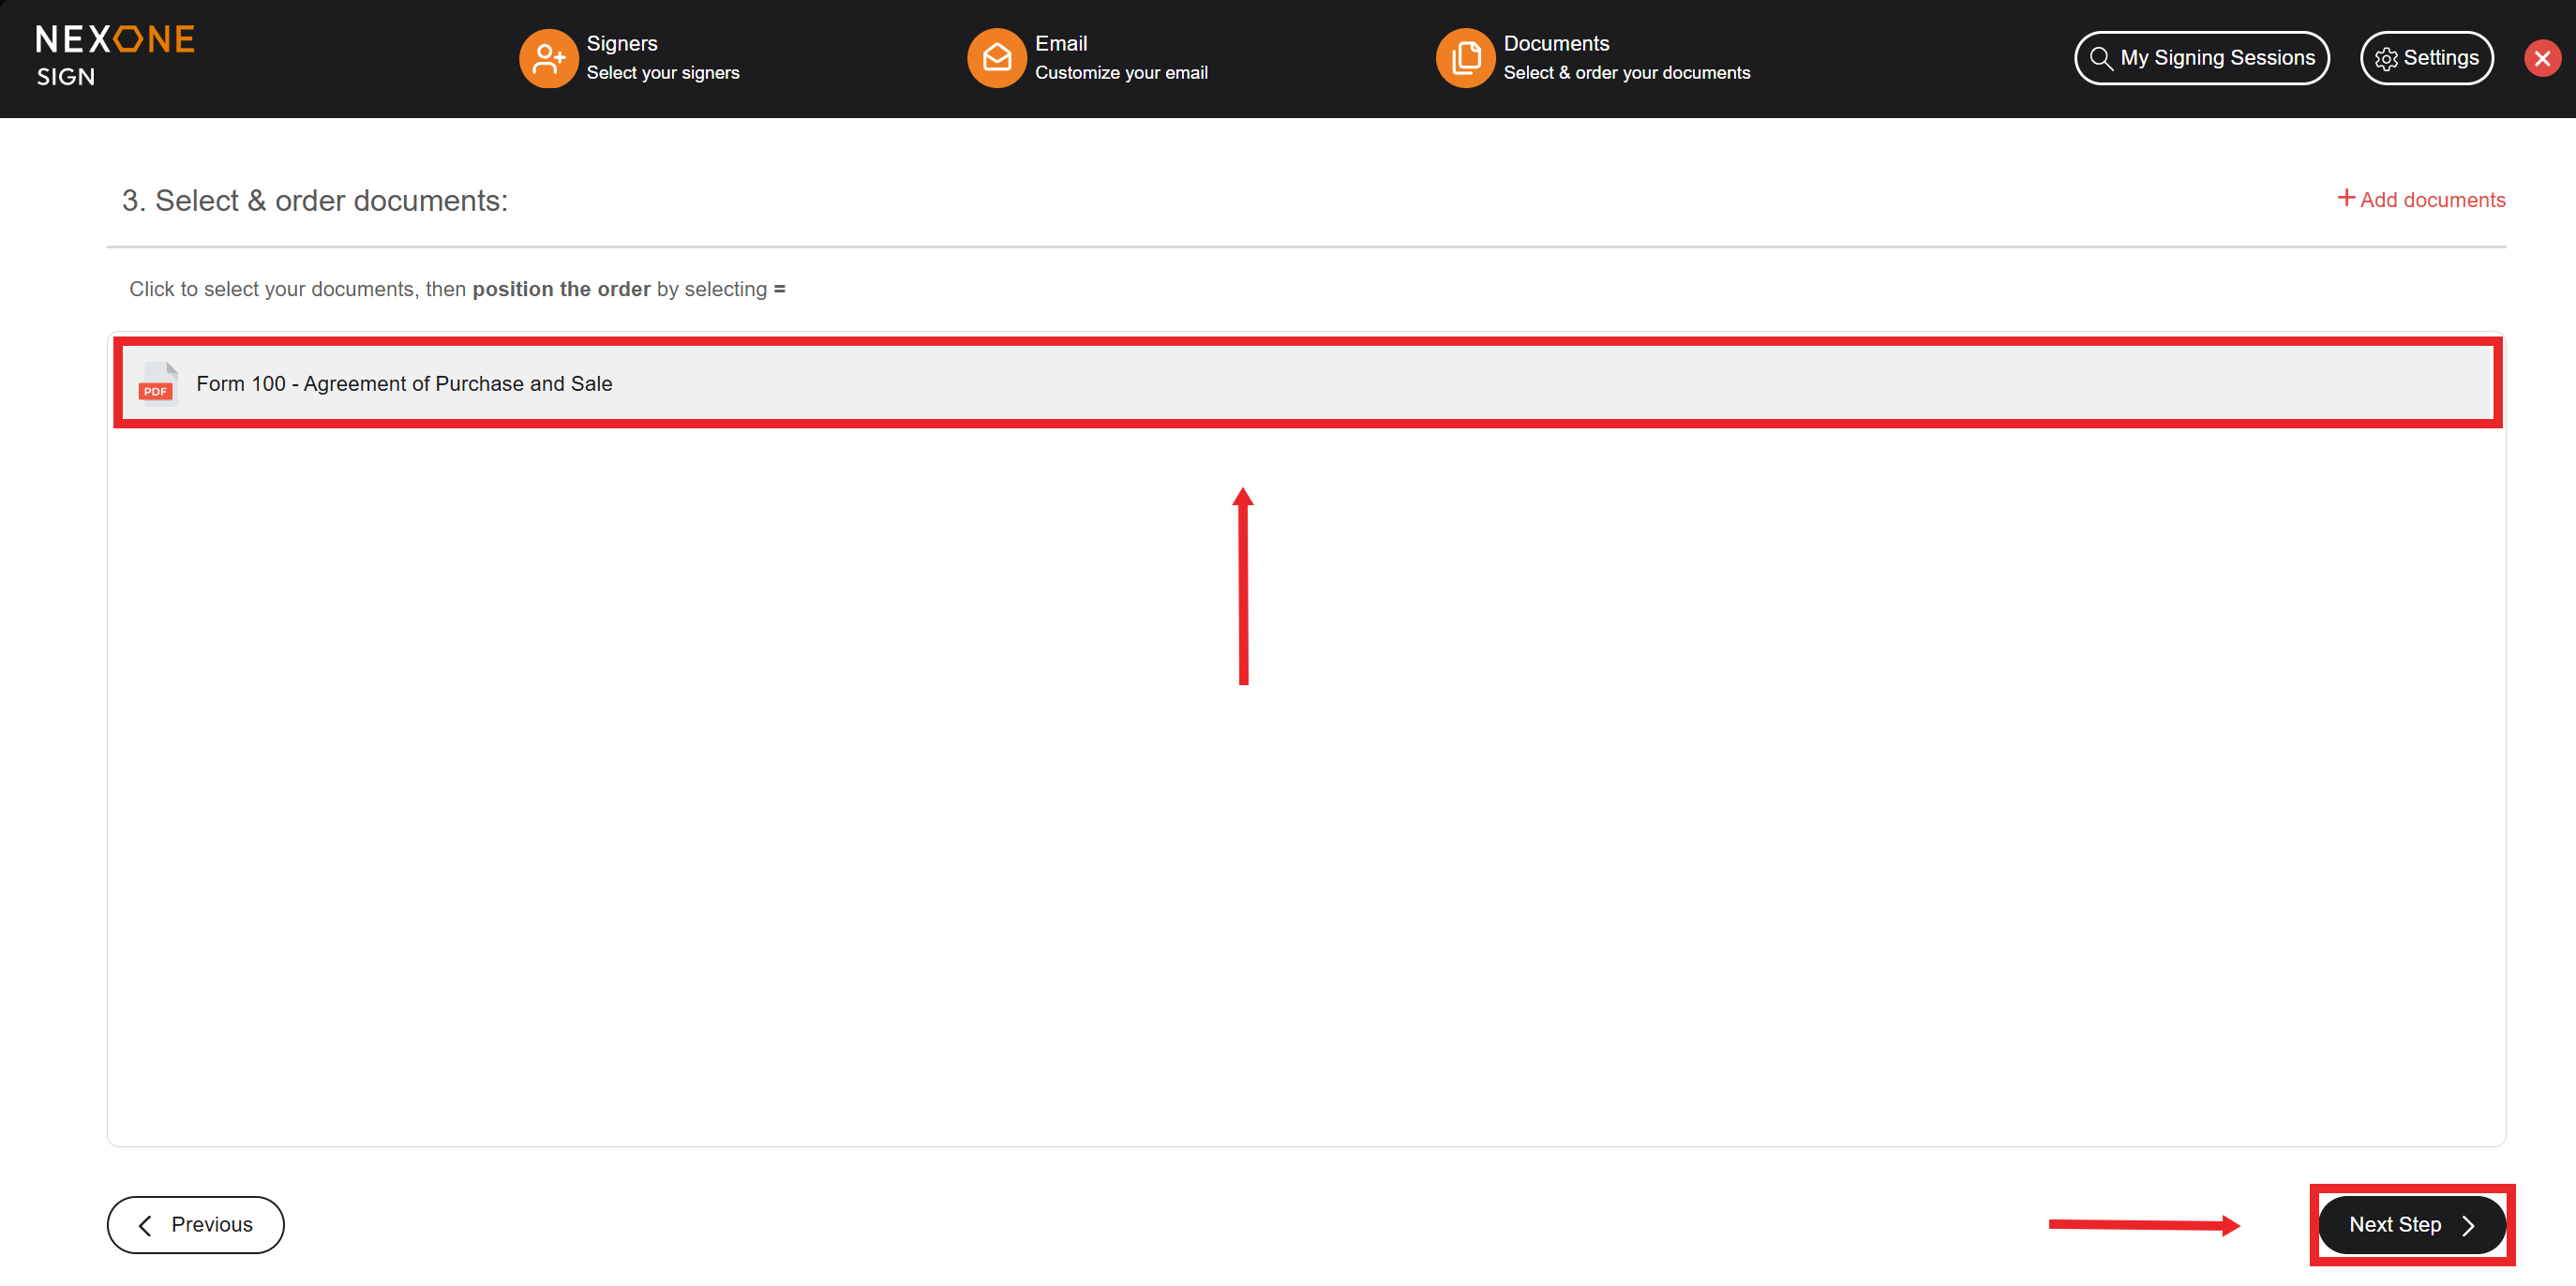
12. Finally, select the document to sign by clicking on the Document's title and clicking Next step.