
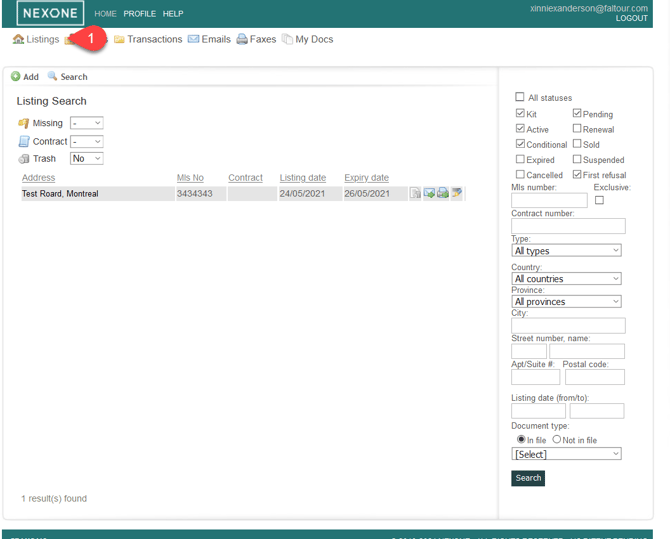
1. Click on the Listing tab
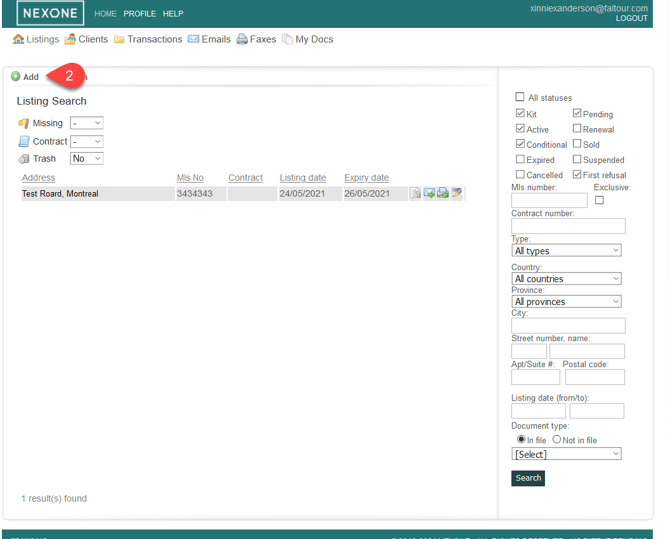
2. Click on the "Add" button
3. Fill the Listing profile information, then click "Next"
Info:Make sure to fill at least the required field: Status, Office, Country & State
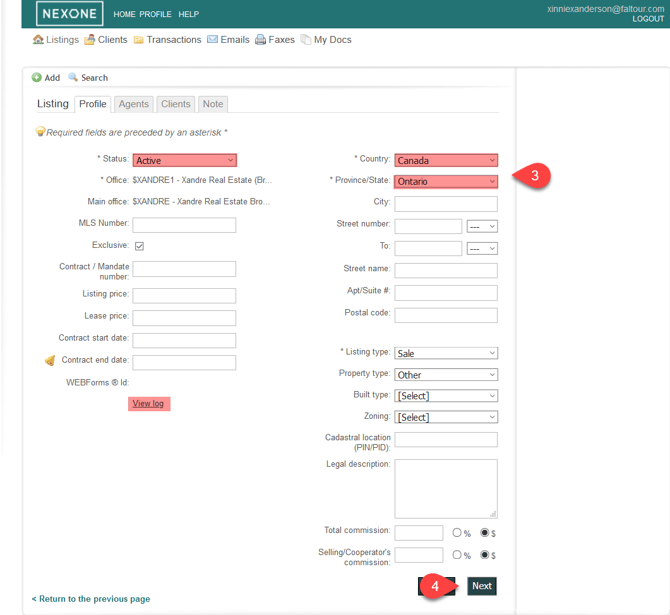
Click on View log to see when and by whom the Listing File was created and modified
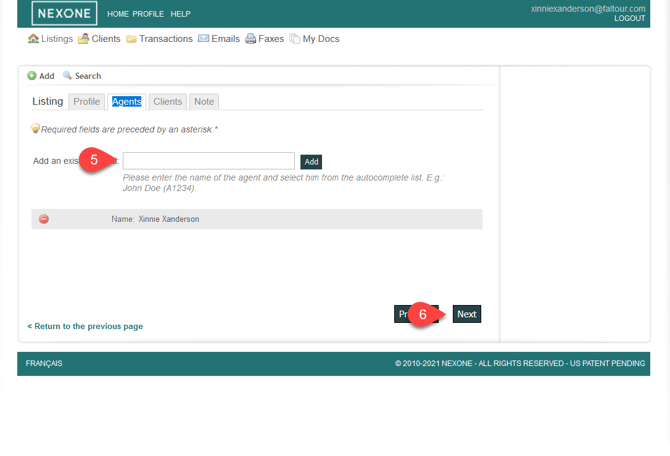
4. Fill the Agent's tab by adding the corresponding agents to your Listing file using the drop down menu in the search field, then click "Add" and "Next"
5. Fill the Client's tab by adding the corresponding clients information to your Listing file, then click "Next"
Info:
Make sure to fill at least the required field: First/Last name & Email address.
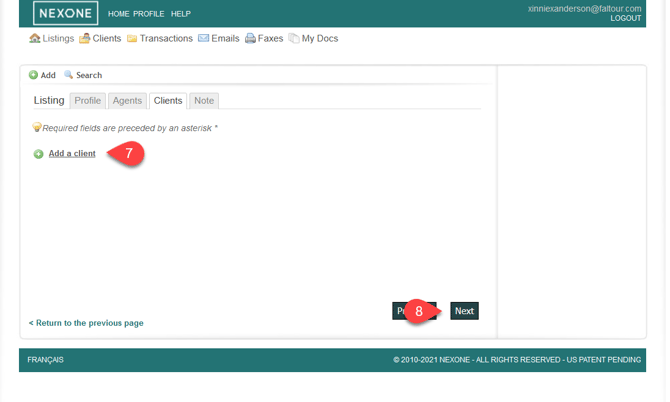
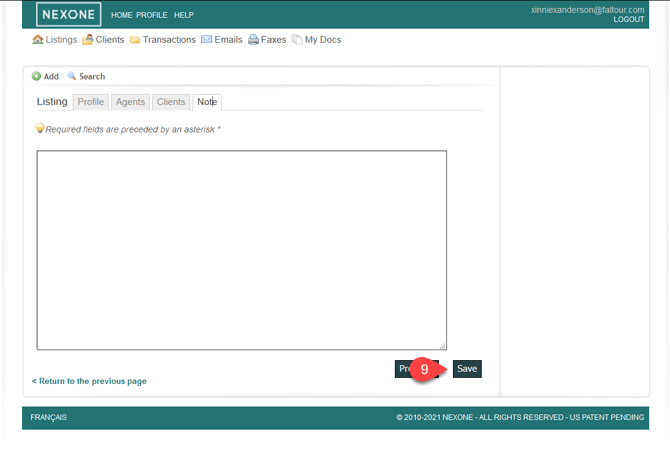
6. You can leave a note about your listing if necessary (not mandatory), and then click "Save" at the bottom of your page
Removing a Listing
Note:
Only Kit status files can be sent to trash. If your status is not set as a "Kit", then you will have to contact your office Admin to send your file to trash.
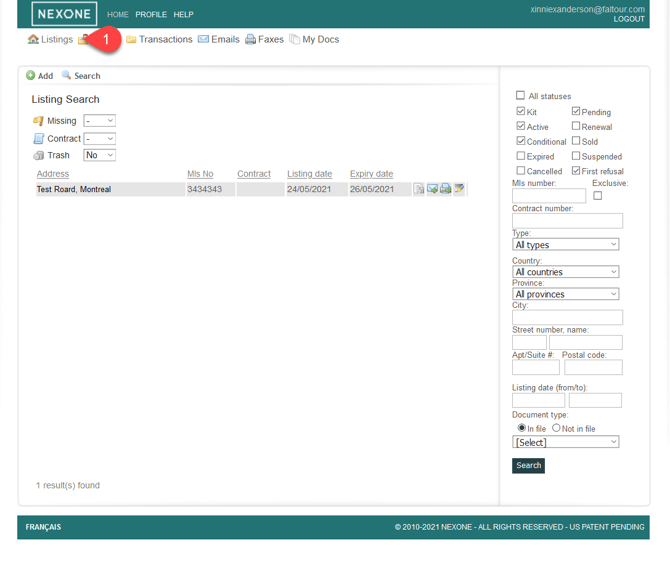
1. Click on the Listing tab
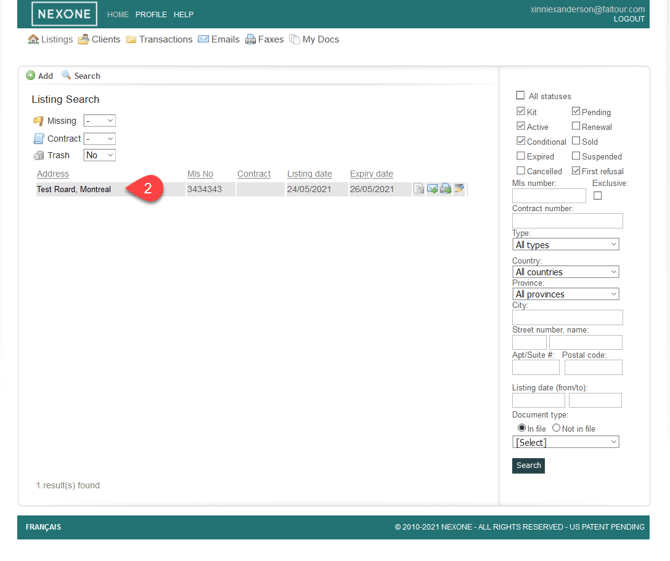
2. Click on your Listing address
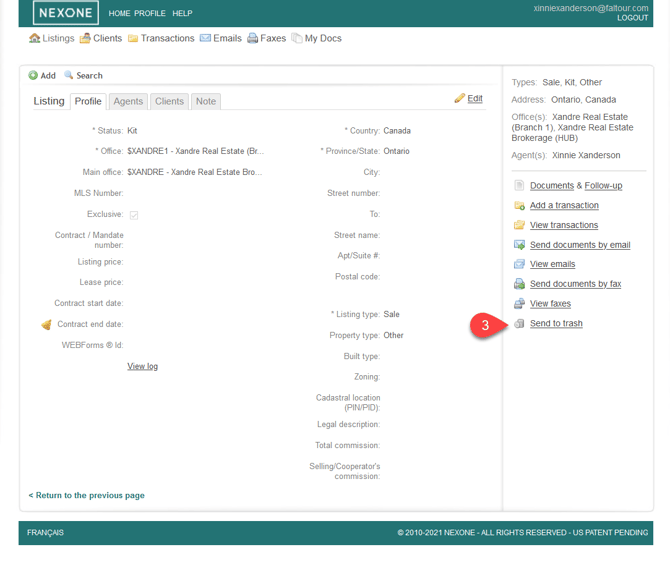
3. Click on "Edit" then "Send to Trash" on your right hand
To avoid duplicating listings, click on the link below: